
Unlock the full potential of your smartphone’s camera and capture breathtaking photos with the perfect settings. This guide explores the best smartphone camera settings for achieving stunning results, regardless of your phone model. Learn how to master exposure, focus, white balance, and other essential settings to elevate your mobile photography. From vibrant landscapes to striking portraits, discover the secrets to taking stunning photos with ease.
Whether you’re a seasoned photographer or just starting your mobile photography journey, understanding your smartphone’s camera settings is crucial. This article provides a comprehensive overview of the best smartphone camera settings, empowering you to take control of your image creation. We’ll delve into the intricacies of ISO, shutter speed, and composition techniques, equipping you with the knowledge to capture professional-quality photos with your smartphone. Transform your everyday snapshots into stunning photos with our expert tips and tricks.
Adjusting Resolution and HDR
Resolution and High Dynamic Range (HDR) are crucial settings that significantly impact the quality and detail of your smartphone photos. Understanding how these settings work empowers you to capture stunning images.
Resolution refers to the number of pixels that make up your image. Higher resolution translates to more detail and the ability to print larger photos without losing clarity. Most smartphones offer various resolution options. Choose the highest resolution available if storage space isn’t a concern. This provides maximum flexibility for editing and printing later.
HDR (High Dynamic Range) helps capture a wider range of tones in a scene, particularly in high-contrast situations. It combines multiple exposures to create a balanced image with detail in both the shadows and highlights. While HDR can be incredibly beneficial, overuse can lead to unnatural-looking photos. Experiment with HDR to understand its effect in different lighting conditions.
Most modern smartphone cameras allow you to manually adjust these settings. Explore your camera app’s interface to locate the resolution and HDR controls. Often, you’ll find them readily accessible within the main shooting mode.
Use Grid Lines for Composition
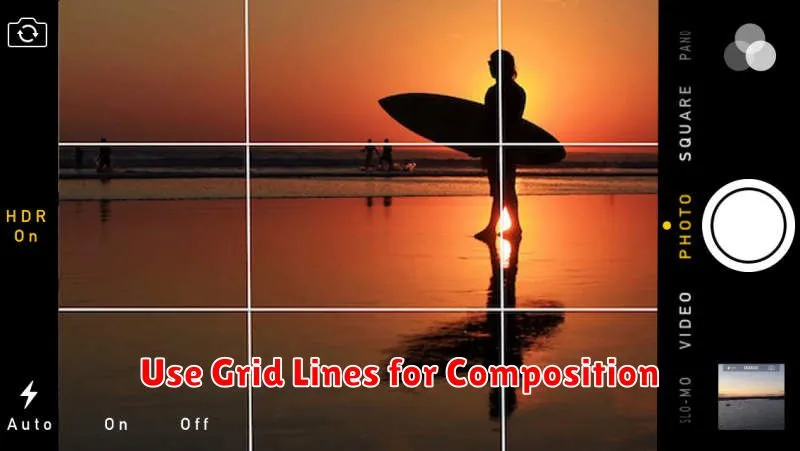
Grid lines are a valuable tool for improving the composition of your smartphone photos. These lines overlay a grid, typically based on the rule of thirds or the golden ratio, directly onto your camera’s viewfinder.
The rule of thirds suggests placing key elements of your scene along these lines or at their intersections to create a more balanced and visually appealing image. Aligning horizons with the horizontal grid lines can also prevent tilted photos.
Enabling grid lines helps train your eye to recognize strong compositions. Even after you become more comfortable with composition principles, the grid can serve as a quick reference to ensure your shots are well-balanced.
Control Focus and Exposure
Mastering focus and exposure is crucial for capturing stunning photos. Focus determines the sharpness of your subject. Most smartphone cameras offer autofocus, but you can often manually adjust the focus point by tapping on the screen.
Exposure controls the brightness of your image. It’s determined by the combination of ISO, aperture, and shutter speed. While some smartphones allow manual control over these settings, most offer simpler tools like an exposure slider. Use this slider to brighten or darken the scene by dragging it up or down, respectively.
Pay close attention to how adjusting focus and exposure affects your final image. Experiment with different settings to achieve the desired look.
Utilize Night Mode

Night mode is a powerful feature available on most modern smartphones, designed to significantly improve image quality in low-light conditions. It works by taking multiple exposures and then combining them to create a brighter, clearer image with less noise.
When shooting in low light, activating night mode is often crucial for capturing usable photos. Without it, images may appear dark, grainy, and lacking detail. Night mode helps to brighten the scene, revealing detail that would otherwise be lost in the shadows. It also reduces noise, resulting in smoother, cleaner images.
Most devices automatically suggest using night mode when the lighting conditions are appropriate. However, it’s often beneficial to manually activate it to ensure optimal results. Experiment with using night mode even in dimly lit environments, not just complete darkness, to see its positive effects on image quality.
Try Manual Mode for More Control
While automatic modes can be convenient, switching to manual mode unlocks your smartphone camera’s full potential. This allows for precise control over various settings, enabling you to capture truly unique and stunning photographs.
Key settings within manual mode usually include:
- ISO: Adjusts the sensor’s sensitivity to light. Lower ISO values for bright scenes minimize noise, while higher ISO values are necessary for low-light situations.
- Shutter Speed: Controls how long the sensor is exposed to light. Faster shutter speeds freeze motion, while slower speeds create motion blur.
- Aperture (if available): Dictates the size of the lens opening. Wider apertures (smaller f-number) blur the background and allow more light in, while narrower apertures (larger f-number) keep everything in focus.
- White Balance: Compensates for different light sources (daylight, fluorescent, etc.) to ensure accurate color reproduction.
- Focus: Manually select the focus point to ensure sharpness where you want it.
Experimenting with these settings can dramatically alter the look and feel of your images, providing artistic control beyond the limitations of automatic modes.